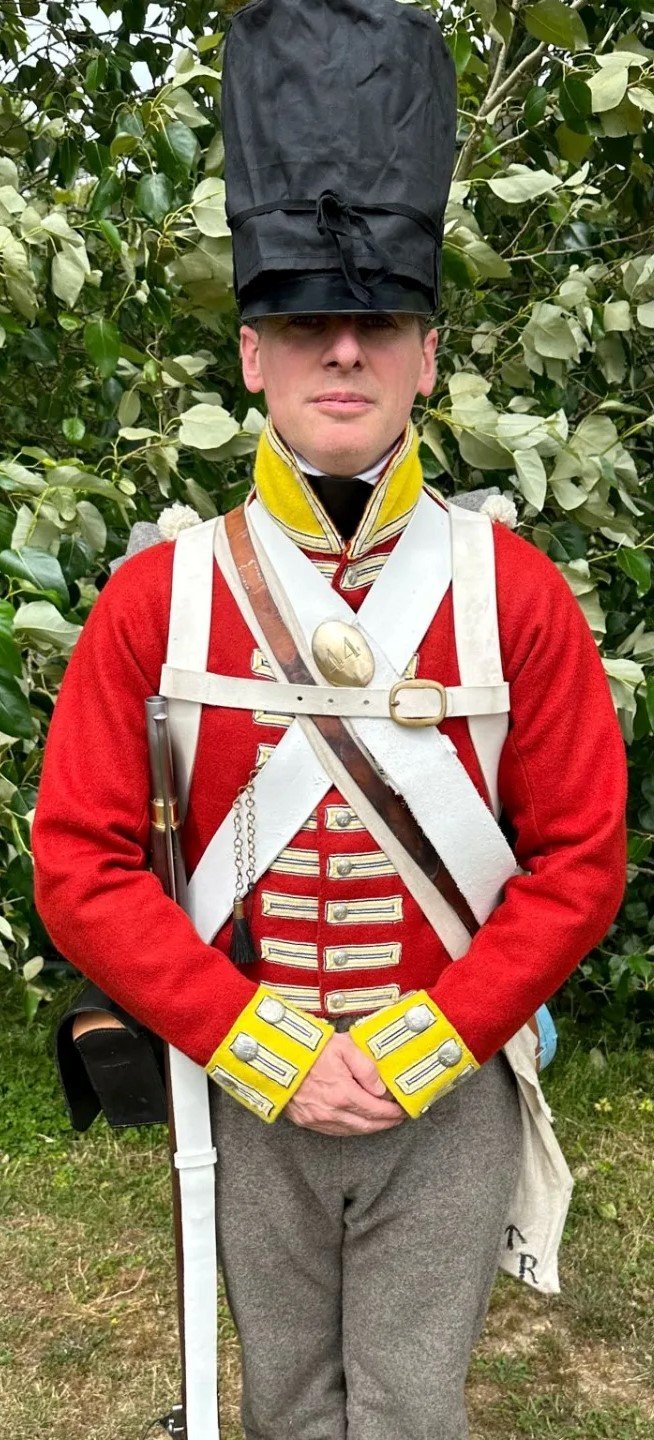


A (Brief) History of the 44th Foot
1793 - 1816
The 44th (East Essex) Regiment of Foot was originally founded in 1741 as the 55th Foot, its first Colonel being Col. James Long. The Regiment served primarily in the UK but its exploits during this period fall outside the scope of this page. Of note, however, is that assumption in 1748 of the number ‘44’. Several regiments were disbanded, many of them Marines, which led to the promotion of their junior regiments. It was not until 1782 that the 44th gained the designation ‘East Essex’ as part of a shake up of the army to help with recruitment. For the 44th (and many other Regiments), however, the title was relatively empty, with recruitment taking part throughout the British Isles (including Ireland) and no real ties being forged with the county during this period.
1793 - 1799: West Indies and Flanders
When France declared war on Great Britain in 1793, the 44th Foot was then quartered in Ireland, a country which features heavily in its story throughout this period. As part of Pitt’s maritime strategy, it was decided that a British army would be sent to the French holdings within the West Indies, then lucrative due to the rich sugar plantations there. This force was formed from whichever units were available and the Irish establishment, in particular, was used to supplement these forces, with 2 Grenadier Battalions and 2 Light Battalions being formed from the Grenadier and Light Companies of the Regiments of Foot then stationed there. As such, the 44th lost both its flank companies (each numbering 100 men by monthly returns) for service overseas. The Grenadier Company, commanded by Captain John Lee, was assigned to the 2nd Battalion of Grenadiers under the command of Lt Colonel John Craddock, QMG. The Light Company, meanwhile, was commanded by Captain Rufane Donkin and was assigned to the 2nd Battalion of Light Infantry, which was commanded by another 44th man - Lieutenant Colonel Bryan Blundell.
These two battalions saw extensive service in Admiral John Jervis and General Sir Charles Gray’s campaign of 1794 and were involved in the capture of Martinique, St Lucia and Guadeloupe. Due to the companies being detached, exact casualty figures are hard to calculate, but it may be assumed that the 44th companies, like the rest of the army, suffered severely from both the enemy and disease. By the end of 1794, the french in the West Indies were resurgent, the 44th flank companies forming part of the garrison of Guadeloupe, which was evacuated in December of that year.
************
Meanwhile in Europe, the main body of the 44th had been earmarked for service on the continent, joining the Duke of York’s expedition to the Low Countries, sailing from Ireland in April 1794 and, after a stop in England, arriving in Ostend on 26th June 1794. Having joined the main body of the Duke’s army, the 44th were brigaded with the 12th (East Suffolk) Foot, 33rd (West Riding) Foot and 42nd (Royal Highland) Foot, under Major General Balfour. The main engagement of this campaign was the action fought at Boxtel where the Allies were attacked by French forces. The British were directed to attack and retake Boxtel, with the 33rd and 44th being chosen to conduct this operation, the 12th and 42nd in reserve. Commanding this endeavour was Lt Colonel Wesley (future Wellesley and Duke of Wellington). Following this engagement, the British forces withdrew.
In early 1795, it became obvious that the British army’s position in Flanders was unsustainable and the troops were withdrawn to Germany and then onto England, arriving in May 1795.
***********
Following their service in Flanders the main body of the Battalion, under Lieutenant Colonel Robert Liddell, was earmarked for another campaign in the West Indies, where the flank companies were still engaged. After several abortive attempts, the battalion finally sailed from the UK in December 1795, arriving in February of 1796. Once in the West Indies, the Battalion took part in the recapture of St Lucia from which British forces had been driven by the French, successfully capturing the island from the French. They then took part in policing of the island, helping to round up small bands of French soldiers who were holding out within the interior.
In 1797, the Battalion returned to the UK, arriving in Gravesend in late July where they made good their losses and reorganised themselves following their period on operations. Their time in the UK was all too short and, in 1798, the Battalion was sent overseas once more, this time under the command of Lieutenant Colonel David Ogilvie, where they would join the British garrison of Gibraltar until 1800.
1800 - 1801: Mediterranean and the Levant
In 1798, General Bonaparte departed France for the Eastern Mediterranean, with the stated intention of landing in Egypt and using that land as a gateway to facilitate the invasion of British India. En route to Egypt, Bonaparte’s fleet stopped at Malta to water and collect provisions. A decision was made to seize Malta for the French Republic and the French forces swiftly reduced the island, capturing the main fortress at Valletta. Following the seizure of Malta, the French forces continued east, landing at Alexandria on 1st July 1798. The French defeated the ruling Mamluks in several engagements, most notably the Battle of the Pyramids, before heading east into modern Syria.The strategic situation changed with Rear Admiral Sir Horatio Nelson’s fleet defeating the French fleet in anchor at Aboukir Bay, securing the Eastern Mediterranean sea for the British and isolating General Bonaparte and the French army. Despite this setback, General Bonaparte continued his campaigns, though he eventually left Egypt in August 1799.
To counter this French threat, in 1800 the British raised an army led by General Ralph Abercromby of which the 44th Foot, still in garrison at Gibraltar in 1800, formed part. The 44th Foot sailed for Malta in October 1800, where it joined the remainder of the army. On 20th December, the fleet embarked for Turkey in order to co-ordinate better with the Ottomans, Egypt nominally forming part of their empire. They remained there until February 1801, when they embarked again, this time for Egypt, arriving off Alexandria on 1st March and anchoring in Aboukir Bay, following the movements of the earlier French invasion. It was not, however, until 8th March that the troops were landed, the 44th taking part in the action and sustaining no casualties. The British continued their advance on the city, encountering an enemy force at Mandorah on 12th March. Early on the 13th, the British forces advanced upon the enemy, the 44th taking part in this action in the 4th Brigade, commanded by Brigadier General Doyle. The action saw the British (13,000) drive the approximately 7,000 French to the west between the Mediterranean to the north and Alexandria canal to their south. The 44th sustained 2 ORs killed; 3 Officers, 2 Sjts and 20 ORs wounded.
With the road to Alexandria cleared, the British now began their preparations to capture that city in earnest, with the British building a series of works to their front in the direction of the city. On the morning of 21st March 1801, the French army sallied forth and attacked the British positions prior to daybreak, capturing one of the redoubts on the left of the British position. After a hard-fought action, the British prevailed at great cost, General Abercromby succumbing to his wounds a few days later on 28th March. The 44th lost 1 OR killed; 1 officer, 1 Serjeant and 14 ORs wounded. Of note, the one officer was their commanding officer, Lieutenant Colonel Ogilvie, who later succumbed to his wounds.
From here, the 44th with much of the army, advanced on Cairo, joining Ottoman forces and besieging that city which eventually fell. They then moved north, taking part in the siege of Alexandria in September 1801 and finally breaking the French hold on Egypt. Following the successful conclusion of these operations, the army began to disperse, the 44th moving to Malta in October 1801 before sailing for the UK in December of that year.
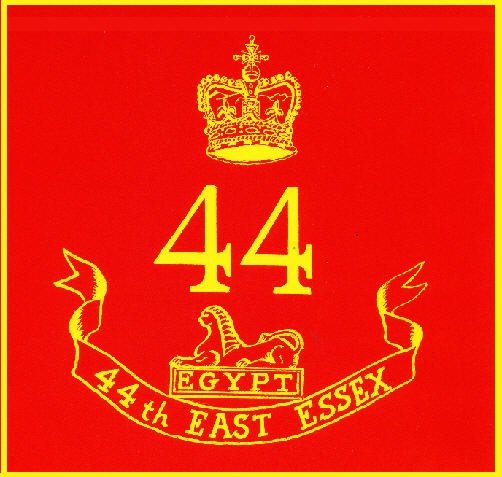
For this campaign, the 44th Foot, along with other units of the British Army present, was permitted to bear the Sphinx and word ‘Egypt’ upon its colours.
1802 - 1809: Garrison Duty and a new Battalion
1802 found the 44th Foot in England, which is where it learned of the short-lived peace heralded by the Treaty of Amiens (27 Mar 1802 - 18 May 1803). In May of 1802, the 44th once more moved to Ireland, landing in Waterford.
In July 1803, the ‘Army of Reserve Act’ and ‘Additional Forces Act’ were passed which allowed the raising of second battalions for a number of infantry regiments, many of which were then in Ireland. As a result of these Acts, the 44th now gained a second battalion for the first, and only time in its existence as the 44th. The original establishment was set at 10 companies consisting of 54 Serjeants, 22 Drummers, 50 Corporals, and 950 Privates, though it would never achieve these figures. Indeed, the second battalions were intended to act as a recruitment tool for the first battalions, the first being the ‘fighting battalion’ whilst the second remained at home to train men and send replacements. As we will see, for many Regiments including the 44th, the realities of the war meant that both battalions would see extensive service. Nonetheless, recruited in Ireland around a core of officers and NCOs from the first battalion, the 2/44 was a very Irish battalion, with the vast majority of its Other Ranks coming from the island of Ireland.
In October 1803, 1/44 re-embarked for England, where they remained until March 1805 when they deployed to the Mediterranean, returning to Malta for garrison duty. 1/44 remained here until 1808, when the flank companies were sent to Sicily to assist with the defence of that island, which was threatened by the Neopolitan forces massing across the Straits of Messina. In september of 1808, they were joined by the remainder of the battalion. Throughout 1/44’s extended stay in the Mediterranean, the returns shows consistently high numbers of men serving with their colours, with large drafts being sent by the second battalion to supplement their numbers.
General Stuart, commanding British Land Forces in the Mediterranean, launched an attack in June 1809 against the islands of Ischia and Procida, two small island off the bay of Naples. These were successfully carried by the British forces, though 1/44 was not involved in their capture. They did, however, land shortly afterwards and assist with garrison duties until their withdrawal to Messina, Sicily in August. In September 1809, the British under Colonel Oswald, resolved to attempt the capture of some the Ionian Islands. These islands, which had previously been under Russian control, had recently fallen to France. One of the longstanding objectives within the Mediterranean, was the capture of a naval base at the entrance to the Adriatic Sea, and this operation was a part of that wider aim, successfully capturing some of the smaller islands, though Corfu with its large garrison remained too tall and ask. Joining this expedition were two companies of the 1/44th.
The second battalion, meanwhile, had left Ireland in March 1804, moving to the Isle of Wight, where it stayed briefly before moving onto Guernsey in October of that year. The 2/44 remained in Guernsey until August 1809 when it moved to the neighbouring island of Alderney.
1810-1815 The First Battalion in the Peninsular, Mediterranean and North America
1810 found the 1/44 in Sicily where it formed a part of Stuart’s army defending against possible Neopolitan attempts to cross the straits of Messina. Although the main body of the battalion was thus committed, the two companies that had formed part of the Ionian expedition, did not rejoin until March 1810. In August 1811, the battalion sailed once more for Malta where it undertook garrison duties throughout the remainder of 1811 and most of 1812. In July of 1812, half the battalion moved to Sicily to, once more, join the majority of British forces in safeguarding that crucial island. An abortive attempt had been made in January 1812 to send two companies, but after only a few days at sea, they returned to Malta.
This arrangement with half the battalion in Malta and half in Sicily continued until February 1813, when the whole 1/44 was reunited in garrison at Malta. This reunification was, however, short-lived with 5 companies moving back to Sicily at the end of March.
In May, the body of 1/44 moved to Sicily but did not land, with strategic priorities now changing. Instead, they sailed westward,leaving 5 companies in Sicily, for the Balearic Islands, landing at Minorca in June 1813. From here, they continued their westward transit, landing in eastern Spain at the Bay of Salou in August 1813, where they joined the British army conducting operations around Tarragona, that city falling to the Allied armies on 18th August. Whilst these 5 companies were conducting operations in Spain, the balance of the battalion finally left Sicily and sailed to join them, the 1/44 reuniting at Villafranca. The 1/44 remained in eastern Spain for the remainder of the war, operating around Tarragona and Saragossa before peace was declared in 1814.
Following the armistice in April 14, the British Government took the opportunity to move veterans of the Peninsular War to reinforce those troops then engaged fighting the Americans in the War of 1812. As such, in April 1814, the 1/44th marched north to Bordeaux, where they boarded ship in mid-May bound for the Americas. Following stops at the Azores and Barbados, the 1/44th arrived in Chesapeake Bay on 3rd August, landing on the Patuxent River at Benedict on the 19th of that month. Following this landing, the small British force under Major-General Ross advanced on Washington DC, meeting and defeating a US force under Brigadier Stansbury.
The US deployments have been much criticised, though it is perhaps fair to mention that a large portion of the forces were militia, arrayed against whom were largely veteran troops from fresh from action in the Peninsular War. Whilst engaged to their front, the US forces were successively flanked by both the 1/44th and 1/4th who rolled up the US positions as they steadily advanced.
Following the British victory, most of the US Militia Forces broke in panic, fleeing through Washington which was now open to the British forces. Entering the city, the British forces had orders to loot and burn all public buildings, amongst which were the White House (which was gutted and had to be almost entirely rebuilt) and the Capitol building. These actions on the part of the British army, are largely seen as retaliation for the conduct of US forces in their failed attempts to invade Canada earlier in the war, in which York was sacked and much private property destroyed.
Following the sack of the US capital, the small British force withdrew, re-embarking with the fleet. In September 1814, an attempt was made to entice the garrison of Baltimore to meet them on the field, though this proved unsuccessful. Following this attempt, a further attempt to engage US forces was made near Potomac in October 1814, but the British forces found the US camp abandoned. The British force then sailed via Jamaica to Louisiana, where they joined the British army in the vicinity of New Orleans in December 1814, helping to repulse an attack by US forces on their position.
On 8th January 1815, after peace had been agreed by Great Britain and the United States, an attack was made against New Orleans, with an effort made against the outer defensive line, some distance from the city proper. The attack itself was a two-pronged affair, with efforts made to either side of the Mississippi in an effort to take batteries that could enfilade the British advance. The 1/44th were involved in the main attack and were responsible for providing fascines and ladders with which to fill a ditch and to provide a means to scale the walls. However, through an oversight, these were forgotten which threw the forward elements of the attack into confusion. Lt Colonel Mullins, commanding the Battalion, was later Court Martialed and Cashiered for this failure. Reports state Lt Col. Mullins was found half a mile from the front line and he was blamed for the failure of the overall attack. Many of the senior officers, including Maj Gen Pakenham, were killed during the assault; Pakenham during the initial wave when he took the assault forward. Although the failure of Mullins and 1/44 certainly contributed to the failure and Mullins was rightly held to account, the plan was an ambitious one and many elements of it had already failed prior to this notable failure.
1810- 1813: The Second Battalion in the Peninsular
On 20th March 1810, 2/44th embarked for service overseas, their destination Cadiz. This was to mark the beginning of a passage that contains some of the most famous exploits of the Regiment in any period, though their service in Iberia was to be relatively brief. They arrived into Cadiz on 4th April and joined the defenders that were manning the fortifications at that time; a small contingent being sent to bolster the defences across the bay at the fort of Matagorda, the remnants of which can be seen today. In late September, 2/44 embarked once more, arriving at Lisbon on 4th October before marching to join the main army at the Lines of Torres Vedras. Monthly Returns from October 1810 show the 2/44th with 418 effectives fit for duty, hinting at something that would plague the Battalion along with those other deployed second battalions, namely the shortage of manpower. Ostensibly raised to both bolster available forces but also to feed the first battalions, these second battalions were often chronically short of manpower when on campaign. 2/44 remained in winter quarters and were assigned to Fifth Division under the command of Maj Gen Leith.
In early 1811, Massena began his withdrawal from in front of the Line of Torres Vedras and Wellington, accordingly, mobilised his army in pursuit. This resulted in the Action at Sabugal in which the Fifth Division, including the 44th, played a part. The French, having been driven from their positions around Guarda, now fell back on Sabugal on the Coa, with Wellington pursuing. on 3rd April 1811, the plan was for Third and Fifth Divisions to advance in support of the Light Division, the latter advancing to contact with the French to their front. The Third and Fifth, meanwhile, would advance on the flanks to support this attack. Unfortunately, this attack was hampered by thick fog and is, perhaps, best known for the near-disaster that overtook elements of the Light Division, with the 95th advancing uphill towards an alerted enemy, taking refuge behind stone walls and facing destruction. With the Light Division in some confusion, the Third and Fifth Divisions announced their presence. The Third Division attacking the French positions whilst the Fifth crossed the Bridge at Sabugal and advanced uphill, driving the French back. Although the Division was not heavily engaged, the Light Companies were, with the 44th’s playing a prominent part in the capture of the bridge.
After these events, the French continued their withdrawal towards the Portuguese border, with the Allied Army under Wellington besieging the Portuguese fortress of Almeida, then held by the French. The Fifth Division found itself posted around a location known as Fort Concepcion on the Spanish border which had been damaged by the French; their task, in company with the Light Division, to guard the approaches to Almeida against French incusions from that direction. In an effort to relieve Almeida which the main Allied Army was then besieging, Massena launched an attack on the village of Fuentes de Oñoro, 3 - 5 May 1811. This was a hard-fought engagement which ultimately resulted in an Allied victory and saw the French rebuffed. The 44th and Fifth Division were not heavily engaged, occupying the extreme left of the Allied line, with only the Light Companies noticeably active, skirmishing against their opposite numbers. The 44th’s Light Company suffered one officer and 4 ORs wounded.
With the French defeat at Fuentes de Oñoro, the siege of Almeida restarted in earnest, with the Sixth Division responsible for the siege of the fortress. Meanwhile, the Fifth Division, still in the locale of Fort Concepcion, were responsible for screening the besieging forces and preventing any attempts at escape from the garrison. This force was responsible for holding two bridges, that at Dos Casas and the one at Barba del Puerco, with Wellington believing the latter was the more likely focus for the French.
At 2330 on 10th May 1811, the garrison of Almeida detonated mines they had placed and sallied from the fortress, sallying forth in two columns and racing for the bridge at Barba del Puerco. The first column managed to navigate this successfully, with the Allied forces responding too late, although they managed to engage the second column and take some prisoners. The 44th’s Light Company was, once more, called on to support this action, becoming involved in the fighting around the bridge.Carter’s history of the 44th states that the Light Company charged stragglers from this force who were unable to cross quickly enough due to congestion and that some men fell from the bridge as a result. The French commander asked permission, and was granted it, to retrieve these men from the ravine, the men of the 44th observing that their opponents were the 31st Voltigeurs with whom they’d been skirmishing on the 5th May.
Following Fuentes de Onoro, the Battalion joined the rest of the army in its manoeuvres towards, and subsequent retreat from, Ciudad Rodrigo, completing the year 1811.
1812 was a busy year for the 2/44th and Army as a whole. When Wellington launched his January campaign to once more attempt the capture of Ciudad Rodrigo, the 2/44th was part of the force, though not used in the assault itself but instead covering the fortress along with the rest of the Fifth Division against the approach of any French relief effort.
With the fall of Ciudad Rodrigo, the Battalion joined Wellington’s forces in moving towards the more southerly Spanish fortress of Badajoz, where they took up positions in late March 1812. A succession of minor operations took place over the next days, with the 44th assisting in some of these as the saps and batteries were progressed towards the walls of the fortress. On 5th April 1812, the breaches were deemed practical and the men of the 4th and Light Divisions nominated as the assaulting forces. Meanwhile, the 2/44th as part of Walker’s Brigade, Fifth Division, were directed to conduct a feint against the Pardaleras and to assault by escalade the San Vicente bastion to the northwest of the city, the breaches lying in the southeastern corner. Meanwhile, Picton’s 3rd Division conducted a similar attack on the Castle located in the northeast.
The attack on San Vicente was delayed by an hour due to ladder-associated delays (apparently a common occurrence in sieges) and finally commenced in earnest around 2300/11PM. The advance was led by men of the 1/4th Foot’s Light Company along with the Light Companies of the Brigade, 2/30th, 2/38th and 2/44th. Managing to approach the fortifications undetected until very close, the light companies planted ladders into the ground by the walls in an effort to achieve the top, but these were too short and fierce fighting ensued. With the attack stalled, Colonel Brooke, 4th Foot and commanding the Light companies, requested support, with two companies of the 44th advanced to provide counter fire in an effort to suppress the enemy along the wall. Under the cover of this fire, the assault party attempted the walls once more, with men finally able to gain entry via an embrasure. With British soldiers now on the walls, the Colours of the 2/44th were hoisted up after them, being the first on the walls of the San Vicente bastion. With the bastion taken, efforts were made to break out into the town and capture adjacent bastions, resulting in severe fighting throughout the city.
Meanwhile, on the opposite side of the city Gen Picton’s 3rd Division had succeeded in breaking into the castle and were also now spreading into the city, with these two diversionary attacks doubtless relieving pressure on the main assault at the breaches which had been stopped after several brave attempts to carry the breaches in the face of determined resistance.
Following the capture of Badajoz, the troops lost all cohesion and control and embarked on the infamous sacking of Badajoz and it is, unfortunately, highly likely that men of the 2/44th joined in these crimes.
The total losses for 2/44th in the engagement were 2 officers and 37 men killed, 7 officers and 88 men wounded, including the commanding officer Lt Col Carleton who had his jaw broken.
Following the capture of Badajoz in April 1812, the Allied armies under the Duke of Wellington, eventually moved further into Spain, with their objective Madrid. After much manoeuvring, skirmishing and actions with detached forces, Wellington and the main French force under Marshal Marmont, finally came to blows on 22nd July 1812 at what would become known as the Battle of Salamanca. The 2/44th were heavily involved in this action and achieved one of their most notable accomplishments of the period during this battle, fighting once more as part of 5th Division; their Brigade Commander, Brigadier-General Walker had returned home after Badajoz owing to wounds sustained and they were now commanded by Brigadier-General Pringle (1/4th, 2/4th, 2/30th and 2/44th).
The battle itself was the result of several weeks of manoeuvring by the opposing forces, with both Wellington and Marmont attempting to gain and advantage over the other by their positioning or force their opponent into an mistake. On 22nd July 1812, just south of Salamanca, both forces engaged in a race within sight of each other to seize two prominent features known as the Arapiles, the Lesser and Greater, which were situated on a plain with the smaller or Lesser Arapile to the north and the Greater Arapile to the south. The Arapiles are significant hills which dominate the surrounding plains and make obvious and natural vantage points for the surrounding area. Both forces were advancing east to west, with the Allied forces under Wellington to the north and the French to the south, with the Allies taking the northern Lesser Aarapile and the French the southerly, Greater Arapile.
With the British in possession of one and the French the other of the two hills, Wellington positioned his forces accordingly, whilst many of his Divisions remained obscured from French view. It seems likely that these Divisions and their manoeuvring caused Marmont to believe that the Allies were withdrawing, with the French army continuing their move to the west, seemingly in an attempt to cut off any British escape. As the French line moved. gaps opened between the Divisions, which created an opportunity the Duke of Wellington was well-placed to observe. Famously, and perhaps apocryphally, he is said to have thrown a chicken leg over his shoulder whilst eaten his lunch, exclaimed, ‘By god, that will do!’ before riding at speed to deliver the orders to attack to Picton and the 3rd Division.
The Allied 3rd Division attacked Thomières's French Division to their front which had become isolated, whilst the 5th Allied Division advanced in support in echelon to their left. With the third routing Thomières, Maucune whose Division was opposed to the front of the Allied 5th Division, formed his men into squares owing to the presence of British heavy cavalry which had advanced in support of the Allied infantry. With the 5th Division, the 2/44th amongst them, advancing and overwhelming these squares, the heavy cavalry brigade under Major-General Le Marchant, was released and route the French, the infantry following them up.
It was during this period that the 2/44th, and more specifically the Light Company, came across the men of the 62eme and began taking prisoners. During this exchange, Lt Pearce observed a French officer with a French Eagle under his greatcoat and removed it from him, with a French soldier trying to prevent this with his musket and bayonet before being shot dead by Pte Bill Murray. The incident is relayed in the words of the then Colonel Pearce in Burrows, p68. Although undoubtedly fortuitous, not least as the Light Company were detached during the capture of the Eagle, the 2/44th had captured their prize which they proudly bore from the field.
With the 3rd and 5th Division, along with the Heavy Cavalry Bde having broken the French left, attention turned elsewhere on the field, with the 1st, 4th, 6th and 7th Divisions, along with Pack’s Portuguese Brigade, attacking the Greater Arapile and the remainder of the French army. Although there was much hard fighting, the Anglo-Portuguese army was ultimately victorious and the enemy left the field, fighting a brave rearguard action as they withdrew from contact.The 44th had started the day with 20 officers and 231 other ranks, losing 2 officers and 4 men killed and 23 men wounded.
This section is under construction and will be added to. Last update: 30th Jun 2026
Further Reading:
Thomas Carter, Historical Record of the Forty-Fourth, or the East Essex Regiment, Naval & Military Press
John Wm. Burrows, 1st Bn. The Essex Regiment 1914-1919, Naval & Military Press
The above books provide a detailed look at the forty-fourth, though neither are without flaws. Carter is the Regt history but is completely devoid of references which makes it incredibly difficult to corroborate material approximately 180 years after it was written and there are passages which are definitely incorrect.
Similarly, Burrows, although more recent (1923), has some issues which stem from both Carter and other historiography-linked misunderstandings of the time. Also, the title is misleading and at least half of the text deals with history prior to 1914.
It should be noted with both, however, and especially Carter, that they may have had access to sources unavailable to us now, not least living members of the Regiment.
Carole Divall, Wellington’s Unsung Heroes The Fifth Division in the Peninsular War, 1810-1814, Helion & Company, 2023
Gary Wills, Wellington at Bay, Helion & Company, 2020
Andrew Bamford, A Bold & Ambitious Enterprise, London: Frontline, 2013
Nick Lipscombe, Wellington’s Eastern Front, Pend & Sword Military, 2016
Steve Brown, By Fire and Bayonet, Helion & Company, 2018
Carole Divall, British Army in Egypt 1801, Helion & Company, 2018
Christopher George, Terror on the Chesapeake, White Mane Books, 2000